Friday 26 May 2017

Star Wars C-3PO [WIP - Arms & Legs]

Just a quick update before Threepio is put together. It's always tempting to quickly finish up a model kit as it nears the end of its build cycle. Having spend so much time working on the same model kit, I guess it's only natural to crave for something new to get creative juices flowing again. So I took a deep breath, shifted down a few gears and patiently worked on the protocol doid's arms and legs. Uniformity was key for his arms and legs to blend in seamlessly with the rest of his body. A long enough time had lapsed in between work on C-3PO that some technique inconsistencies could arise.

Bandai Star Wars 1/12 Scale C-3PO: work-in-progress on his arms and legs

Minor subtleties in technique application such as misremembering what paint:solvent ratio to use; how much pressure to apply; etc. can sometimes be a factor when one forgets to jot down the details earlier and when not enough muscle memory has formed especially for new techniques. Speaking of which, I painted Threepio's palms even though relevant decals had been provided. It just didn't make sense to use decals their 'look' would have been incongruent with the shiny gold plating. Painting the surface of his palms in matt black hues also made the gold-painted nodes stand out more.  

Everything on Threepio's open palm was painted i.e. the gold nodes and black coating

Options were available to make Threepio's arms either static or movable. Tiny parts (see below) representing the droid's intermotor actuating couplers allowed for simple extending movements in both arms. Originally, these parts was moulded in an ugly mustard yellow which looks completely out of place on the shiny gold plating. Solution? Paint them metallic gold and finish with a wash.  

Components which allow for movable arms on Threepio
Threepio's intermotor actuating couplers were repainted in gold vs the sprue's original ugly mustard yellow
Threepio's left/right arm options (movable and rigid) as well as shoulder joints

Depending on the type of paint used, the final level of gloss can differ. In my case, I used Vallejo Model Color Old Gold and Gold as well as a black acrylic wash. It resulted in an overly weathered and dulled down metallic look that I didn't care for. So the final built will instead make use of the non-movable version of his arms for a more uniform look. The static arm version has gold plated intermotor actuating couplers already moulded rigidly onto the upper and lower arms thus connecting them in a fixed position. Matching paints to the gold plating was always going to be a tough ask so Bandai could've at least moulded the movable connectors in gold plating.

Outer part of Threepio's legs were weathered with oil-based paints and a semi-gloss clear coat
Shown here are the inner parts of both the protocol droid's legs

Although I usually take photographs of my miniatures/model kits using a black background, this was the first time I was doing so for the Bandai Star Wars 1/12 scale C-3PO model kit. Reflective surfaces don't play well with dark surfaces as they tend to reflect their surroundings. So that means Bandai's product photos of C-3PO were either taken against a black background using high-end photography lighting or taken against a white background and digitally edited onto a black one. Wouldn't I love to be a fly on the wall on Bandai's official product photography session of C-3PO.    

Threepio with his detached arms and legs, this time against a white background
Both the left and right hands have two options each: open palm and slightly clenched
Two different viewing angles of Threepio's arms against a white background
Silver-plating on Threepio's lower right leg is 100% movie accurate

So Threepio is essentially done. All there is left for me to do is put him back together albeit better than how Chewbacca did in Empire Strikes Back. Chances of Threepio being completed by next week are definitely higher than his oft quoted 725 ... to one odds. Until then, be well and be happy!

http://shireworks.blogspot.com/https://www.facebook.com/shire.works

Saturday 20 May 2017

Star Wars C-3PO [WIP - Lower Torso & Pelvic Area]

On the surface, painting Threepio's multi-system connection wires (see below) might seem to be the most difficult task faced by a modeller working on this Bandai Star Wars 1/12 scale kit. But in reality, this couldn't be further from the truth. Personally, I found the work done on Threepio's armour to be much more difficult even though it was already moulded in 'golden' hues. Care had to be taken not to accidentally strip Threepio's gold-plating while creating a weathered yet shiny look to the whole piece. In that regard, Lady Luck played a role in preventing things from going south.  

Bandai Star Wars 1/12 Scale C-3PO: work-in-progress on the lower torso and pelvic area

There wasn't going to be a second chance with Threepio's armour. If the gold-plating stripped off during the weathering process then the model kit would no longer be the protocol droid we know and love from A New Hope. He would instead be the one in Attack of the Clones. Still cool but not the droid I was looking for. Lady Luck smiled on me in the sense that I found a long-sought-after weathering product required for the task - Mr Weathering Color and Solvent. And it's very easy to strip off the gold paint. All I had to do was dab the plastic with a bit of Mr Cement S extra thin glue and out came the gold paint. Add some weathering to the now silver part and voila ... battle damage.

If only these gold platings could talk ... battle damage on C-3PO's left hip
Painting the individual wires on C-3PO's abdomen was a hassle but totally worth it 
Back view of C-3PO's lower torso and rear-end

Coming back to Threepio's multi-system connection wires located on his abdomen, it was a great move on Bandai's part to design a three-tiered wiring system (see below). This provided the section with added depth and realism. It also made it easier to paint the individual wires. After each and every level was stacked on top of each other, Threepio's abdominal section looks fantastic.    

Bandai made an excellent design choice to stack three levels of wiring on top of each other
C-3PO's pelvis was painted with Mr.Weathering Colors and sealed with a semi-gloss clear coat

Once completed, Threepio's lower torso/pelvic area was promptly attached to his upper torso. So far what I imagine in my mind is how he's turning out to be. C-3PO is coming along nicely indeed.  

Bandai Star Wars 1/12 Scale C-3PO work completed so far - head, torso and pelvis
Photography lighting issues saw C-3PO's armour reflect light in a less than ideal way i.e. too dark
C-3PO's primary power coupler outlet (round thingy on his stomach) shines the brightest at this angle
Side view (left) showing how C-3PO's hip battle damage looks in relation to his upper torso and head
When the lighting is angled just right ... C-3PO's armour shines through even the semi-gloss coating
But when the lighting is a tad off ... the gold plated armour loses its shine
And the shine is back again ... lots of tweaking of the lights lie ahead for the completed photos
Side view (right) showing C-3PO sans arms and legs

The photos above don't really do Threepio justice. I have yet to arrange the lighting lamps at optimal positions so as to properly highlight his gold armour. All in all Threepio still looks too dark in the photographs. Hopefully I will have this issue sorted out by the final photo session. Thanks for following my progress on C-3PO so far, and do have a great weekend ... what's left of it anyway.

https://www.facebook.com/FourEyedMonster-313145002078520/

Sunday 14 May 2017

Star Wars C-3PO [WIP - Head, torso & a weathering test]

After a few weeks of having to hand wash clothes, it feels great to finally have the washing machine back in working order. More importantly, it frees up valuable time for hobby work. And that was spent on early assembly and paint work on the 
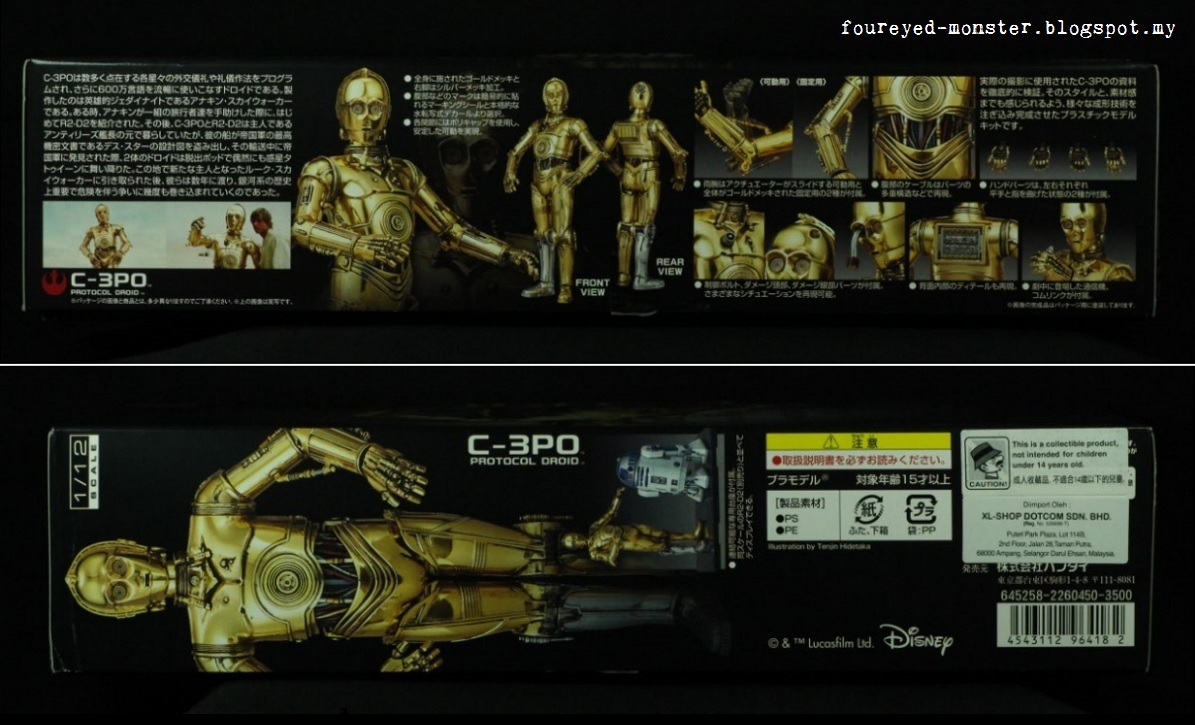
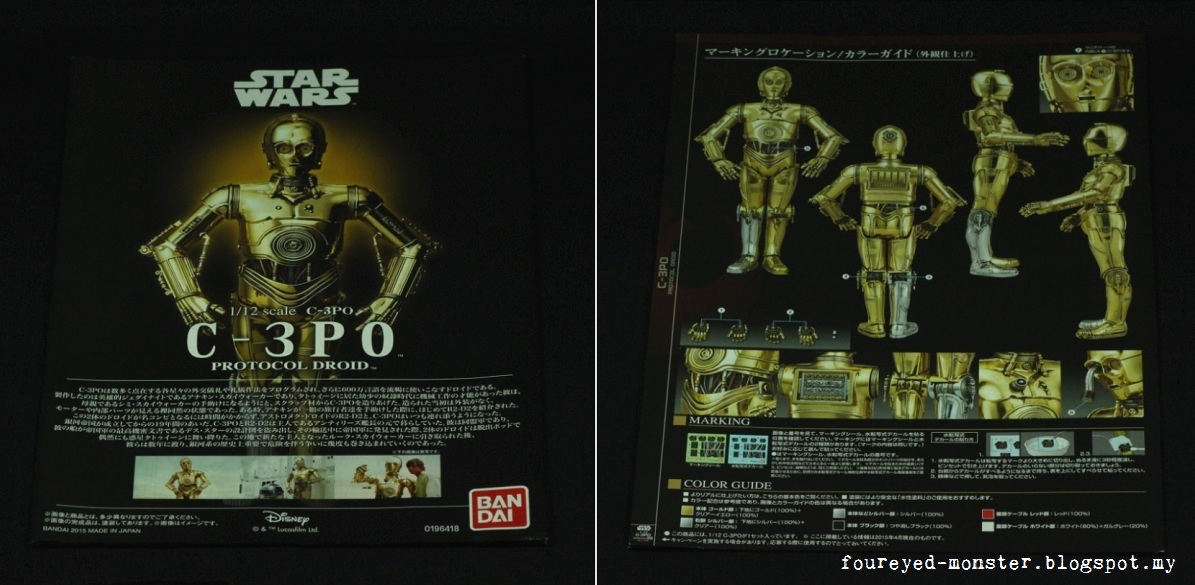
Bandai 1/12 scale C-3PO model kit. Thus far I have only managed to complete Threepio's head and upper torso. It's moving along at a snail's pace but that's okay by me seeing that the model kit requires delicate work, more so than most kits anyway.    

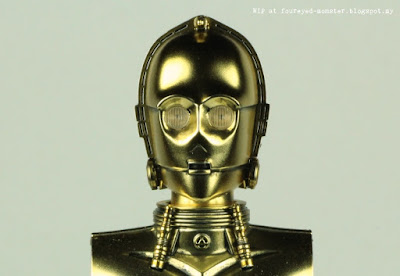
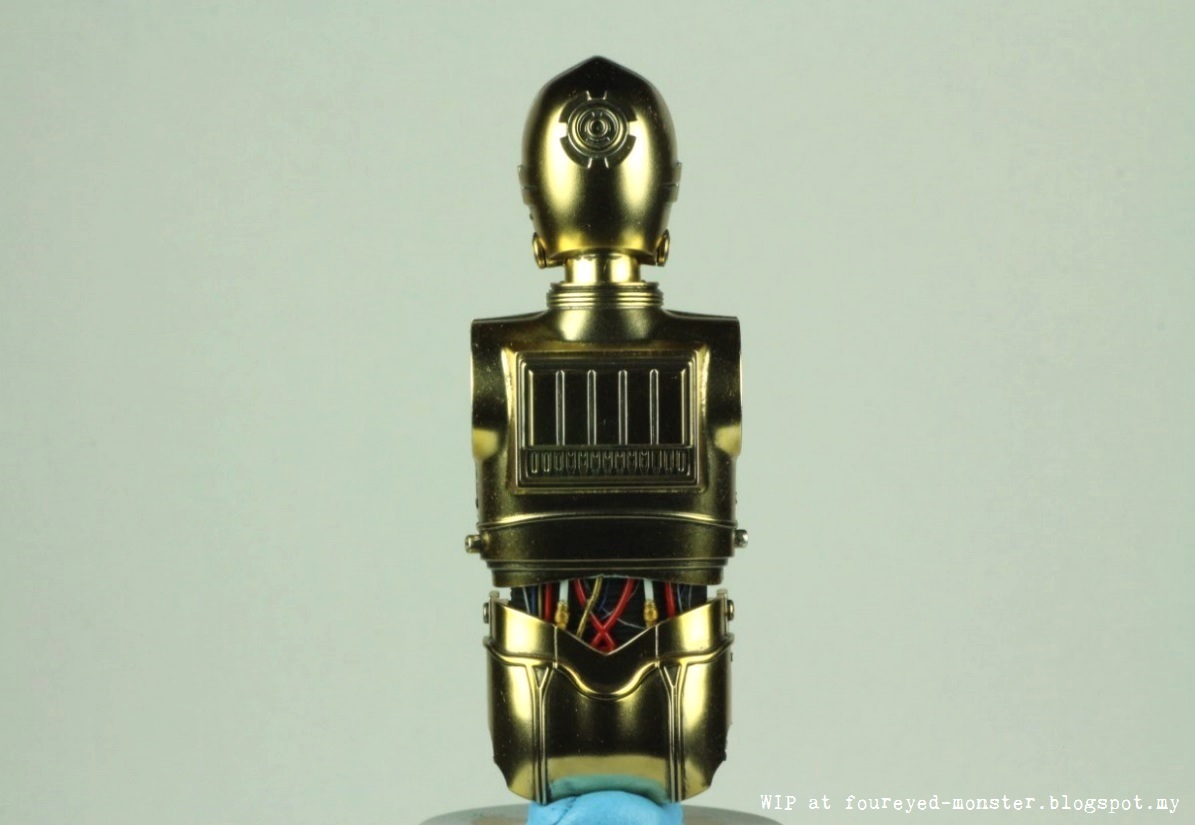
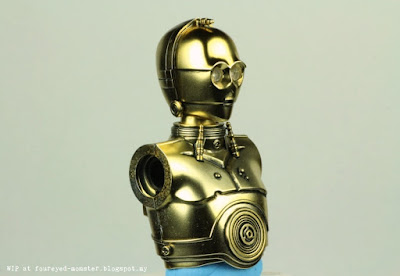
Bandai Star Wars 1/12 scale C-3PO: work-in-progress on his head and torso

With beautiful gold plated chrome-like parts, C-3PO's armour had the potential to look good without any major basecoat repaints. But that still leaves a lot of work to be done especially in the realm of realistic weathering. My main paints in this endeavour were the Mr Weathering Color oil-based paints and their corresponding solvent Mr Weathering Color Solvent 110. It's likely these are enamel paints though I can't say for sure. One thing I noticed is they seem to be less 'harsh' on the plastic compared to other enamels like the Tamiya Panel Line Accent Color (more on this later in the post).  

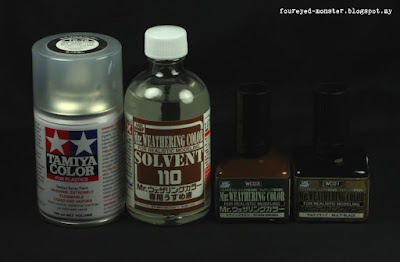
Mr. Hobby's Mr. Weathering Colors and Tamiya's TS-79 Semi-Gloss Clear were my main paints for this project

Prior to sealing everything in with a clear semi-gloss clear coat, I used a combination of black (Mr Weathering Color - WC-01 Multi Black) and a mixture of black with brown paints (Mr Weathering Color - WC-03 Stain Brown), both diluted with varying ratios of Mr Weathering Color Solvent 110 to create washes and paints. These were then applied to Threepio's head and upper torso to create a sense of depth to the whole piece. I found Mr Hobby's weathering paints easy to work with. They adhered well into the nooks and crannies of Threepio's armour. Not only that, Mr Hobby's oil based paints were easy to clean and in some cases little to no solvent were required when cleaning.   

Mr. Hobby's weathering paints effectively filled crevices 
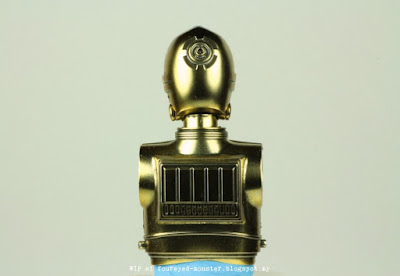
Bandai Star Wars 1/12 scale C-3PO (front view view)
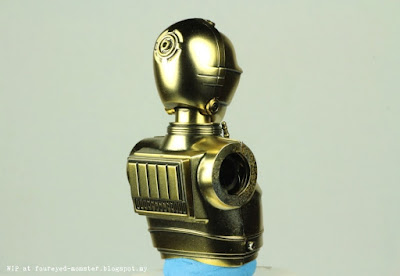
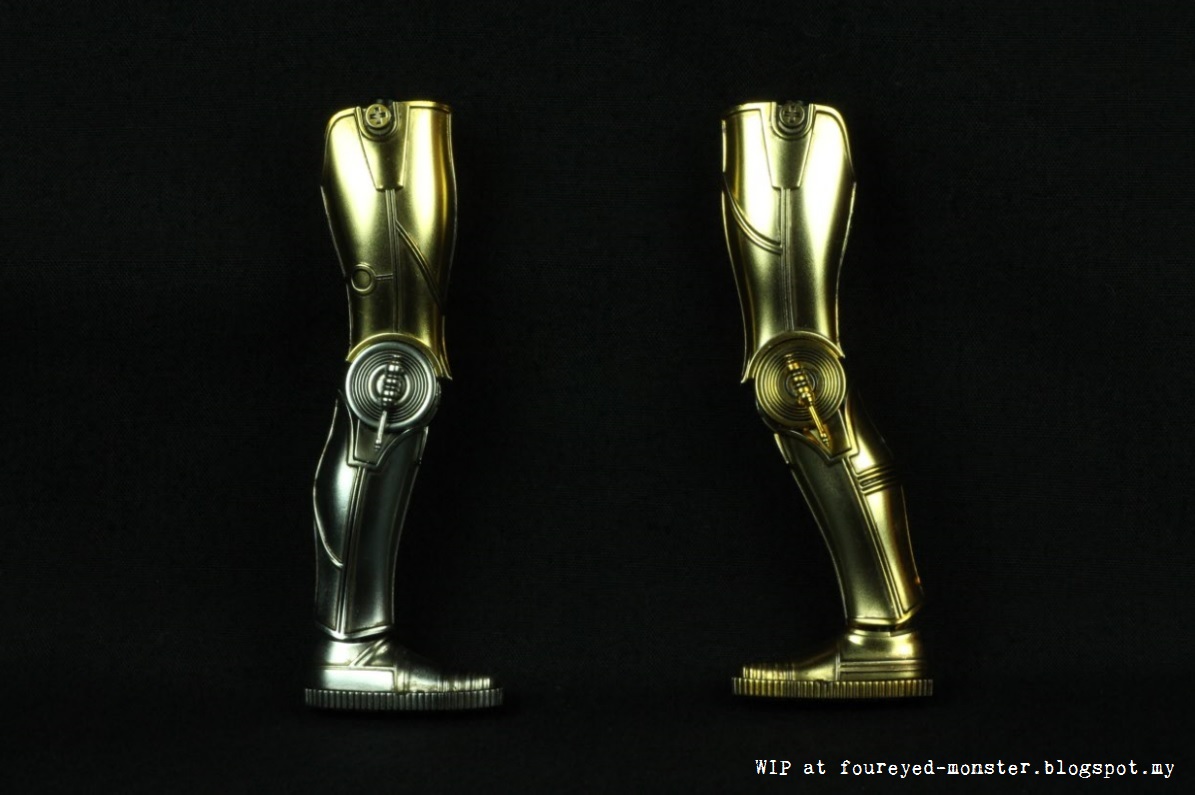
A semi-gloss clear coat reduced the level of shine reflecting off C-3PO's gold armour

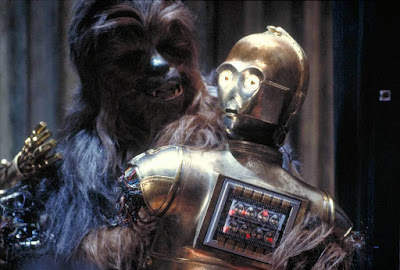
Bandai's attention to detail is already evident at this early stage of the build. As the series of photos below show, Threepio's 'gold-plated' back panel first opens up to reveal a transparent plastic casing which in turn covers up a detailed thingamajig comprising gold, silver, red and white doohickeys. Threepio's back instrumentation panel of-sorts was first seen in Empire Strikes Back and to be honest I never really noticed it until now when working on Bandai's plastic model kit.

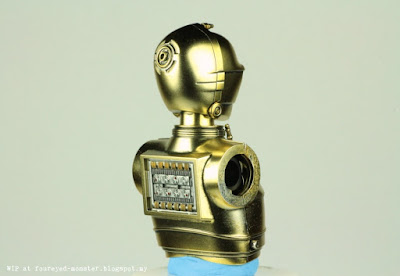
C-3PO back panel exposed; it was painted with gold, silver, white and red paints
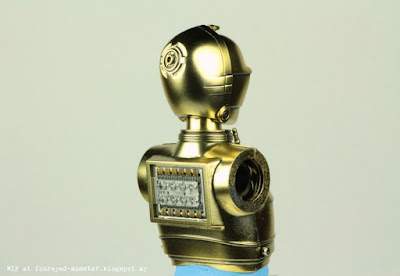
C-3PO back panel covered by a piece of plastic casing
C-3PO back panel completely covered up by the gold-plated armour
Oh, oh, that's much better. Wait... wait. Oh, my! What have you done? I'm BACKWARDS.

Threepio had a semi-gloss clear coat applied to him for the following reasons. Firstly, the original 'gold-plated' armour was far too shiny for my tastes so a semi-gloss coating was applied to damp down the shine to an acceptable level. Secondly, it produced a slightly more weathered look to Threepio's armour. And thirdly, in an ironic twist the muted shine made Threepio's armour look more metallic than the original shinier parts which in my opinion looked a tad plasticky.

Bandai Star Wars 1/12 scale C-3PO (back view)
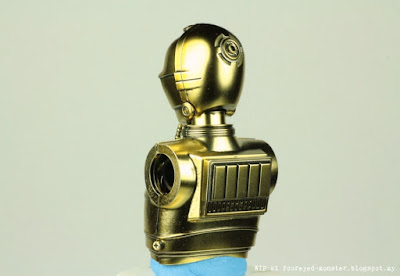
Final semi-gloss coat also gives C-3PO a more 'weathered' look

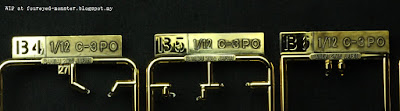
Prior to using Mr Hobby's oil-based weathering colors, I tried out the Tamiya Panel Line Accent Color and a black Citadel acrylic wash on the shiny 'gold' plastic parts. In comparison to the Mr Weathering Color paints, it seemed harder to clean any excess Tamiya panel liner off the plastic. Meanwhile once any excess acrylic wash had dried, it tends to cloud the armour and become nigh impossible to be removed. But it's important to note that Tamiya's enamel paints are formulated more as a panel liner while Mr Hobby paints are intended for more general weathering use. So I'm not exactly comparing like for like - it's more like seeing how different products affect the plastic.   

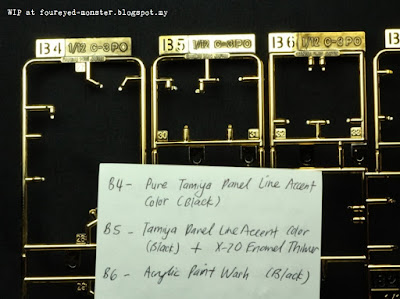
A test involving Tamiya's Panel Line Accent Color and X-20 Enamel Thinner as well as Citadel's black wash
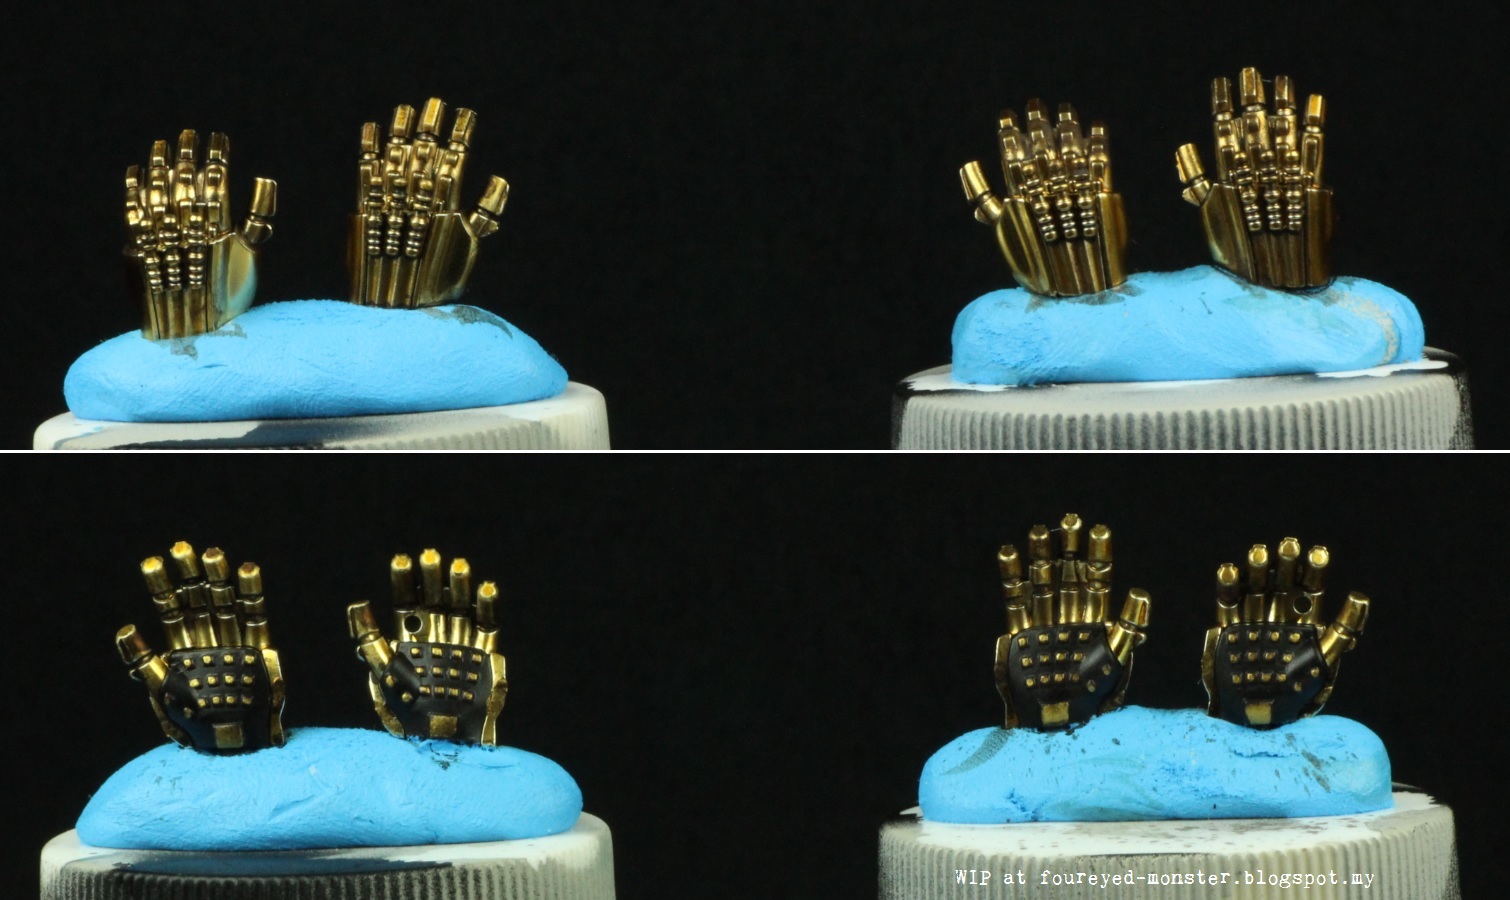
Closeup of the results of the weathering test on C-3PO's gold armour

Mentally exhausting and detailed paint work lies ahead in this project as next up is Threepio's abdominal section which comprises thin wiring of many hues. So keep tuned for that one. And on a completely unrelated note, I have finally got around to watching the Big Bang Theory sitcom. Wow! What can I say other than I absolutely love this awesome show. With that I leave you with my new favourite geeky word of the day ... Bazinga!

http://shireworks.blogspot.com/https://www.facebook.com/shire.works

Saturday 6 May 2017

Star Wars C-3PO - Bandai 1/12 Scale Model Kit [Unboxing and Pre-Assembly Review]

Any Star Wars fans' droid collection wouldn't be complete without C-3PO. More so with R2-D2 and BB-8 patiently awaiting the protocol droid to join them on the display shelf. And now is a better time than ever to start working on a C-3PO model kit. For the longest time now, the only versions worthy of a place in a discerning hobbyist's collection were from Sideshow Collectibles. And like most Star Wars fans out there, I could never justify expending a severely limited hobby budget on a Sideshow piece. But Bandai's foray into the Star Wars franchise has changed the market dynamics. Retailing at about ¥3780, the Bandai 1/12 scale C-3PO is a wonderfully detailed model kit with huge potential.   

Bandai Star Wars 1/12 scale plastic model kit of C-3PO, protocol droid
C-3PO box art as seen on the sides of the packaging

Potential is the key word here. It's mind blowing to see such high level of movie-accuracy being exhibited  that this model kit's plastic parts exhibit. To get the best out of this kit, it's essential to paint and weather C-3PO so that it reflects the signature Star Wars universe 'used-and-worn-look'. Even if assembled straight-out-of-the-box without any additional work done on it, C-3PO will still look good albeit in a toy action figure kind of way. So the model kit caters to hobbyists at different skill levels.

Bandai C-3PO assembly and decal instructions, front and back cover
Assembly instructions for C-3PO: while visually clear, a scan using Google Translate App is recommended

Most striking to the eye is the gold (and silver) chrome-like plated parts. This is advantageous to beginner hobbyists as well as budget conscious veterans in that no gold/silver paints will be required. The caveat being that if you choose to weather the assembled model kit then extra care will be required to prevent the gold/silver plating from stripping off. In the future, I'll be conducting tests to see how resistant the gold/silver plating is to weathering chemicals such as oils, enamels and acrylics.

Sprue A: Abdominal section plus innards, eyes, and miscellaneous parts
Sprue B1: Head, torso, arms, pelvic, thigh, etc.
Sprue B2, B4, B5, B6, B7, B8: Arms, hands, legs, feet, etc.
Sprue B3: Silver leg/foot, and exposed back panel

Another great thing about this model kit are the options available for building the specific version of C-3PO that you want to mimic from the movies. Among these optional parts are a dented or normal droid head; chest plates with or without a restraining bolt; and photo-receptors that fit normally into or dangle out from the eye sockets. In addition, the various arm/leg joints available from the sprues suggest that the Bandai C-3PO is going to be reasonably articulated. At least well enough for the protocol droid to move his arms and legs in the stiff robotic manner as seen in the movies. 

Sprue PCF-6AC: Internal joints to enable articulation of C-3PO
Sprue SWB3: A simple black base for C-3PO
Water decals (left) and stickers (right) for the C-3PO plastic model kit

Both the water decals and stickers available for this C-3PO plastic model kit conforms to Bandai's usual high standards. That being said, I feel for the most part it's still better to paint the parts than to use decals/stickers. There are times when decals would do the job perfectly - in C-3PO's case that would be the photo-receptor (eye) decals. However, areas like the wiring on his abdominal section and gold plating on his palms will be better off getting a paint job as it'll look far more realistic. All in all, this is a great kit from Bandai and one that does justice to C-3PO and the Star Wars franchise.    

http://shireworks.blogspot.my/p/custom-painted.html
Related Posts Plugin for WordPress, Blogger...